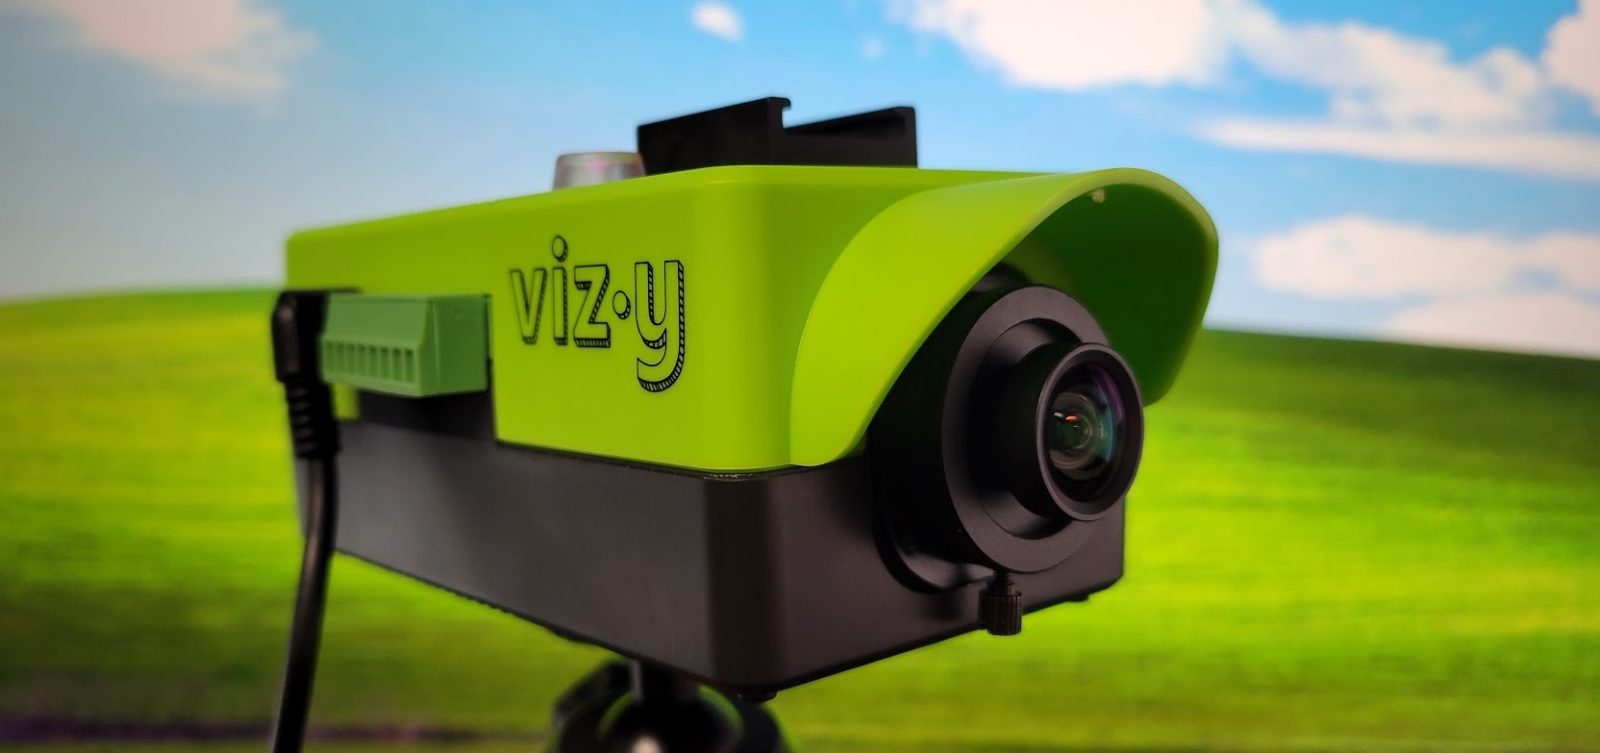
I just scooped up a Vizy Camera for a for a robot project I have in progress. Essentially this is a Raspberry Pi 4 with an Arducam camera and a custom power board in a bespoke case. Check the reviews on tomshardware and hackaday for a little more info. My first impressions are mostly positive – it was super easy to get straight into the included examples by following the quick start guide here.
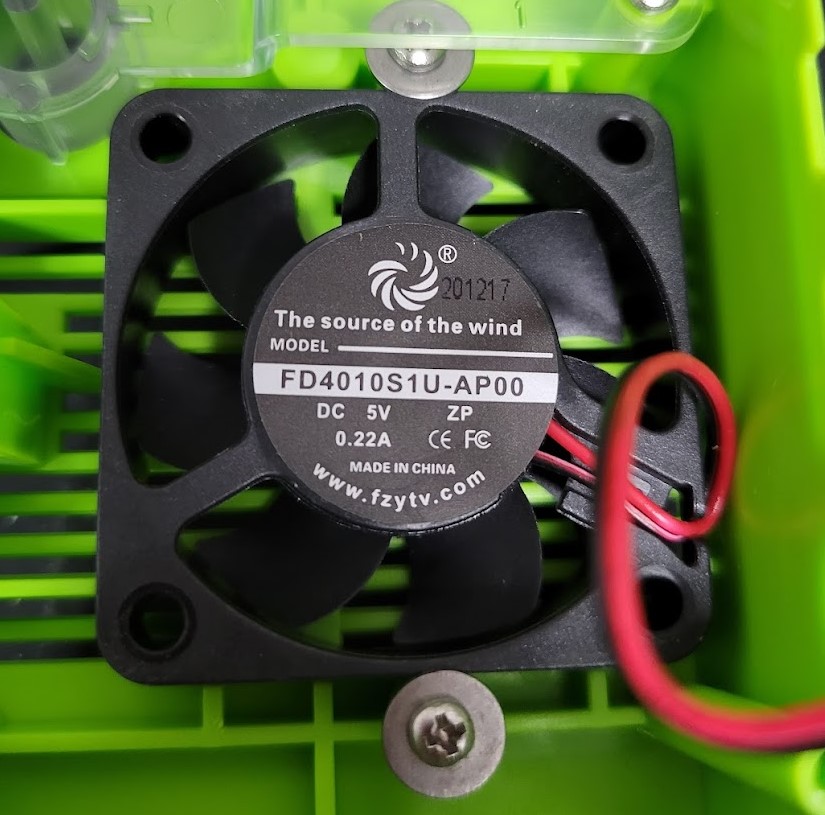
One negative that is immediately apparent is the cooling fan – it is hideously noisy – at low speeds there is a distracting amount of PWM noise. I quickly replaced this with a Noctua fan and it has made it far more tolerable to have on the desk while I work with it now. The other thing I’m not thrilled with is the documentation: it is quite good for set up and working with the examples; after that it tapers off, this is the best example to follow so far. I’m inexperienced with Raspberry Pi, not a Python expert, and have never worked with computer vision, so didn’t really know where to start. As I write this I have only spent a few hours poking around, but I do have VS Code hooked up so I can explore the scripts on the camera and start fiddling around – I want to share that in case I can help another newbie.
So, the goal is to be able to use VS code to explore and edit python files on the camera remotely from a desktop or laptop. I’m not going to cover using VNC to remotely access the pi desktop, or connecting to the drive over the network since Vizy mentions it here. The things I’m listing basically follow this much better guide.
- Naturally the first step is to download and install VS code on your PC if you don’t have it already
- Power up the camera and get it onto your network
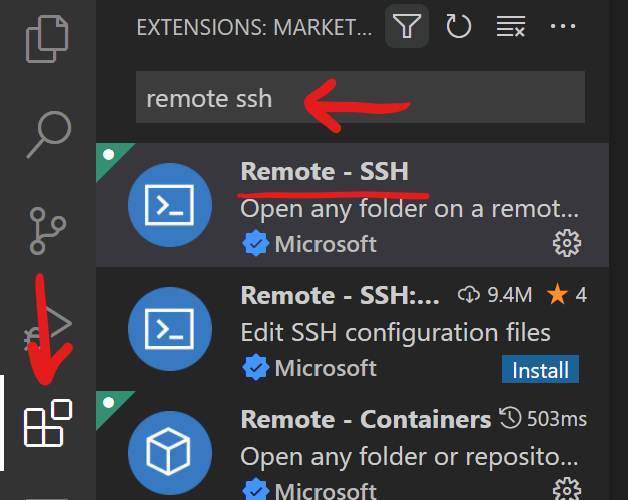
- Open VS code, click on extensions, search for “remote ssh” and install it. It was already installed for me, so you may be able to skip this.
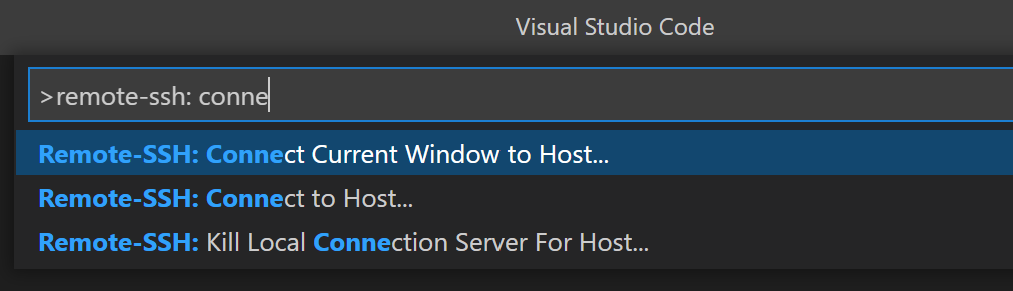
- Open the command palette with CTRL+SHIFT+P and start typing “Remote-SSH: Connect current window to host”, then select it
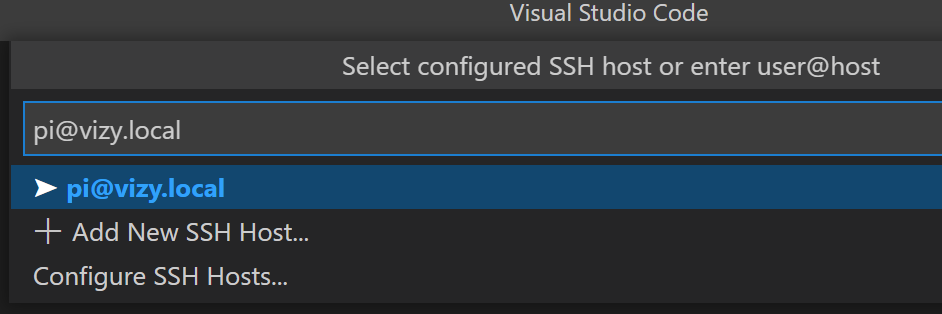
- Select “add new SSH host”
- If you haven’t changed any settings on the camera, enter “pi@vizy.local” for the connection
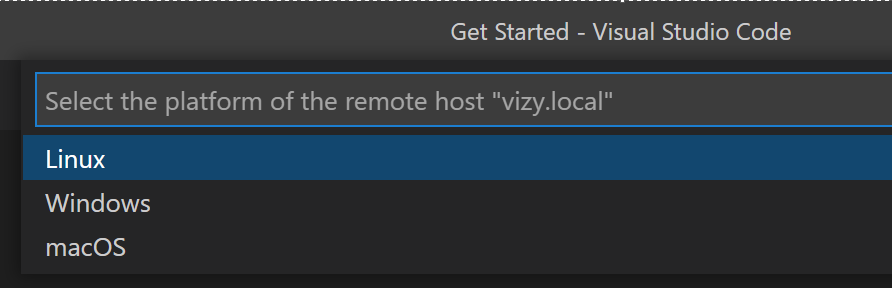
- Select Linux
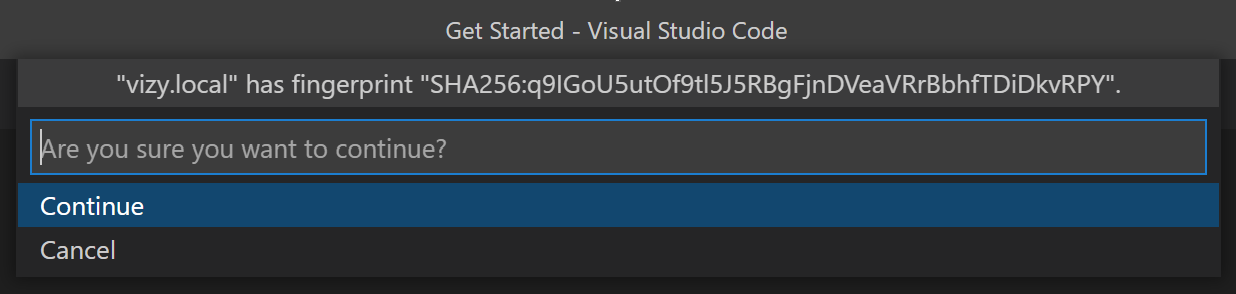
- Confirm and continue
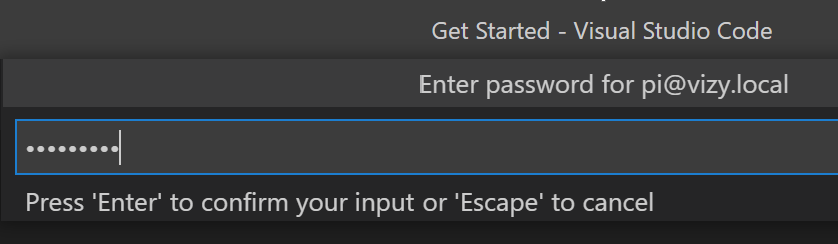
- Next you should be prompted for a password, the default on the camera will be “raspberry”
- If everything works, VS Code should connect and will install some stuff on the camera, so just wait a bit
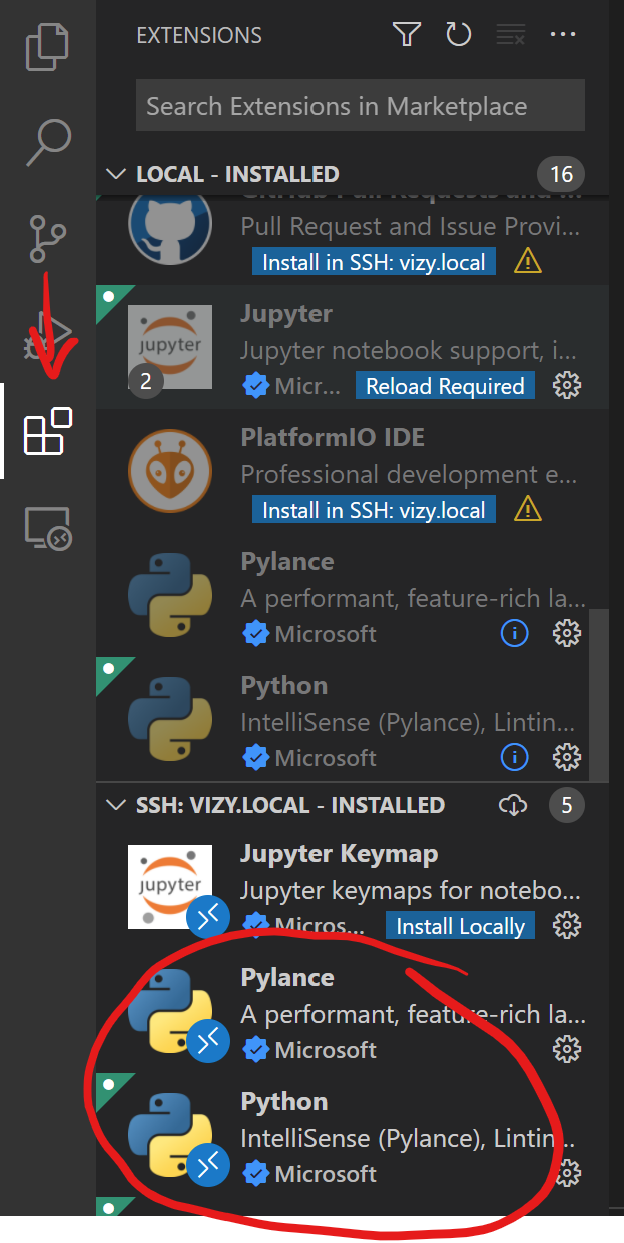
- Go back to the extensions menu, you should now see another section (it may be collapsed) named something like “SSH: VIZY.LOCAL – INSTALLED”. We want to add Python and Pylance here. I already had these on my local machine, so they were showing under the SSH section with a blue button that said “Install in SSH: vizy.local”. Click that and wait some more. Adding these extensions will enable linting and all the usual python features for VS Code, and they’ll work remotely.
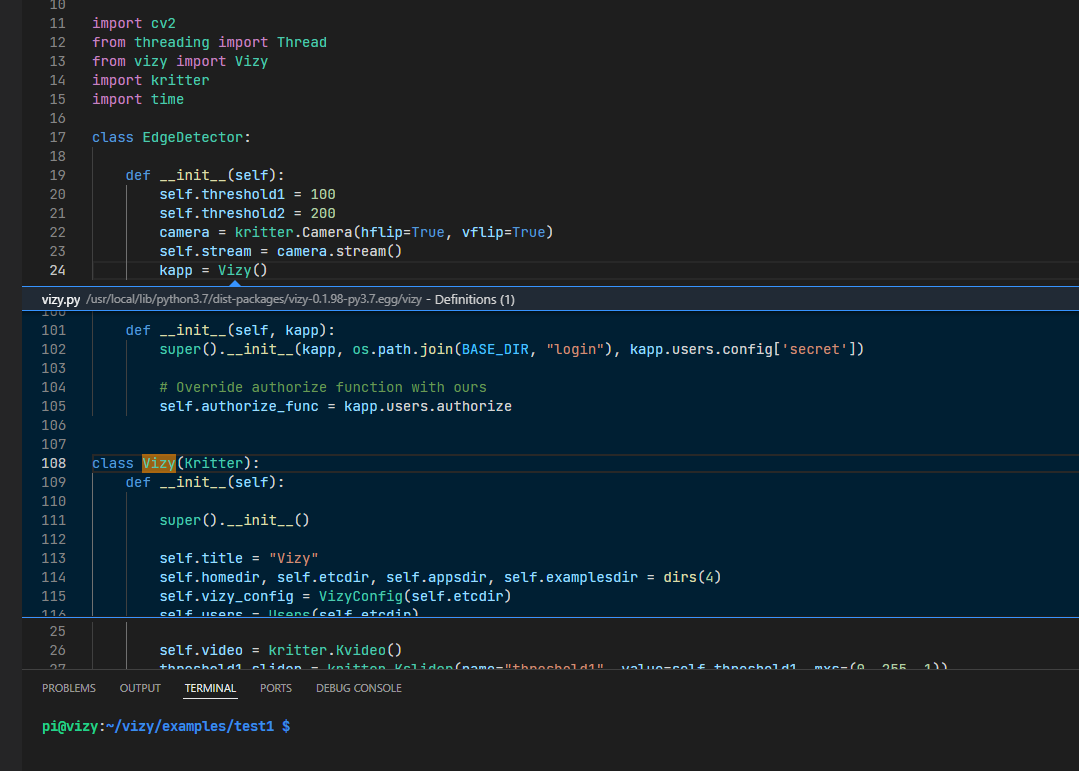
- Now that you are connected, using file->open folder will open a dialogue box, from here you can pick a directory on the camera and open it up. You should be able to use this workspace in the same way as your local machine and do things like this: