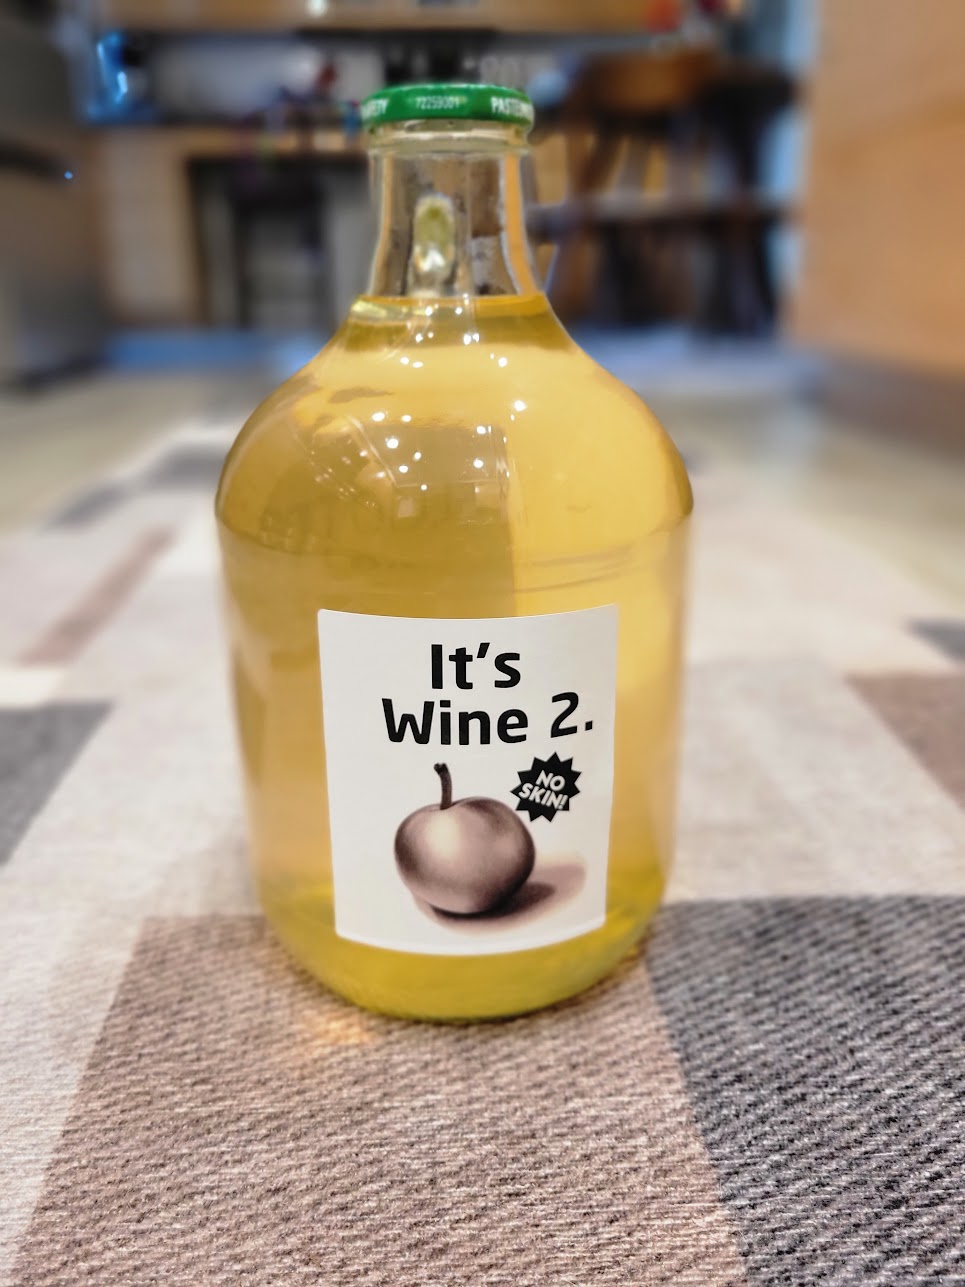
This is another smaller batch of golden plum wine. The main difference between this and the previous one is that the skins were removed before fermentation and it was only sweetened about half as much.
Fun fact: the plum on the label was drawn with stable diffusion.
8/18
Started with 16 pounds of plum goop. These were rinsed, pitted, then pressed through a sieve to separate the squishy stuff from the skins.
Added water for a total of ~4.5 gallons
Added 4.5 lb sugar for a starting gravity of 1.060
Added sodium metabisulfite
8/19
Added yeast (Lalvin K1-V1116)
Added yeast nutrient
Added pectic enzyme
8/25
Racked
Gravity : 0.996
9/10
Racked again
Added sparkolloid to clarify
Gravity: 0.992
9/22
Racked yet again
Added potassium sorbate to stop further fermentation
Added 1 cup of sugar to sweeten
Bottled
This one turned out a little less tart than the previous batch that were fermented with the skins, and it was also far clearer and had less sediment.
This is a sort of journal for some batches of homebrew, there’s a link on the label to this page hopefully – just in case it turned out to be good and I want to repeat it. Compared to the following batch, leaving the plum skins on during the fermentation made it more difficult to clarify and seems to make it a bit more tart or whatever. I don’t know anything about wine. I was aiming for a bit lower alcohol content, but this yeast definitely will go higher if you give it enough sugar.
Fun fact: the plum on the label was drawn with stable diffusion, that’s why it looks like an ambiguous fruit.
8/15
Started with 26 pounds of golden plums after rinsing, pitting, and squishing
Added water to reach ~5 gallons
Gravity was 1.020, added 5.625 pounds of sugar for a starting gravity of 1.060
Added sodium metabisulfite
8/16
Added yeast nutrient, pectic enzyme, and yeast (Lalvin K1-V1116)
Fermentation began by the next morning
8/20
Racked, added 1/2 cup sugar and pectic enzyme
8/29
Racked again
Added sparkolloid to clarify
9/16
Racked yet again
Added 1/4 tsp metabisulfite and 2-1/2 tsp potassium sorbate to prevent further fermentation
In this post I’ll share my implementation (so far) of an approach to find the distance and direction of a beacon, with an end goal of building a human following robot. It’s not an original idea – here is an earlier project by Ben Heck and Jesse Robinson that does the same thing. Check the bottom of this post for a quick video demo of the thing.
The setup
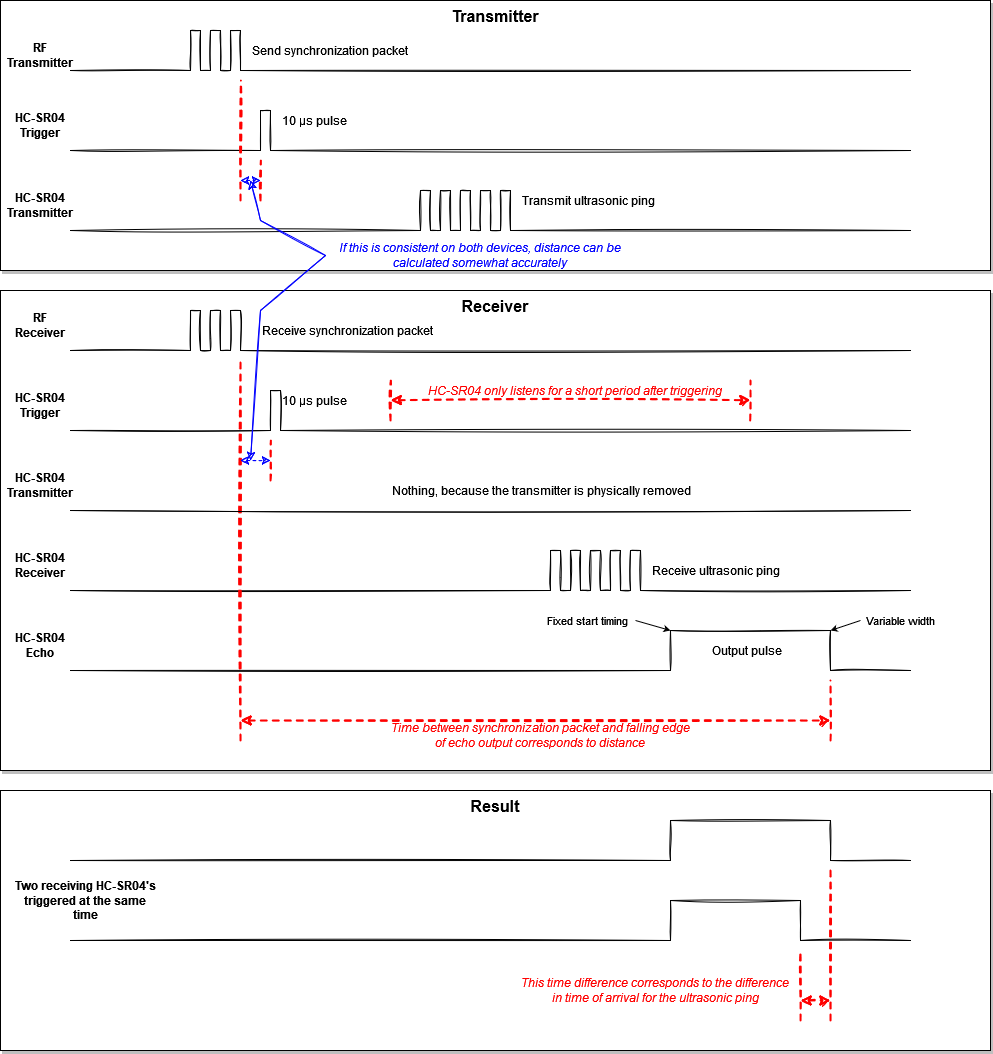
The simple idea is to have a beacon that emits a 40kHz “ping” and a pair of receivers – by comparing the difference in arrival time at each receiver, the angle to the beacon can be calculated. For the distance measurement, a radio signal can be used to synchronize the beacon with the receiver, the difference between when the RF and sonic pulse corresponds to the distance.
What makes this a hack
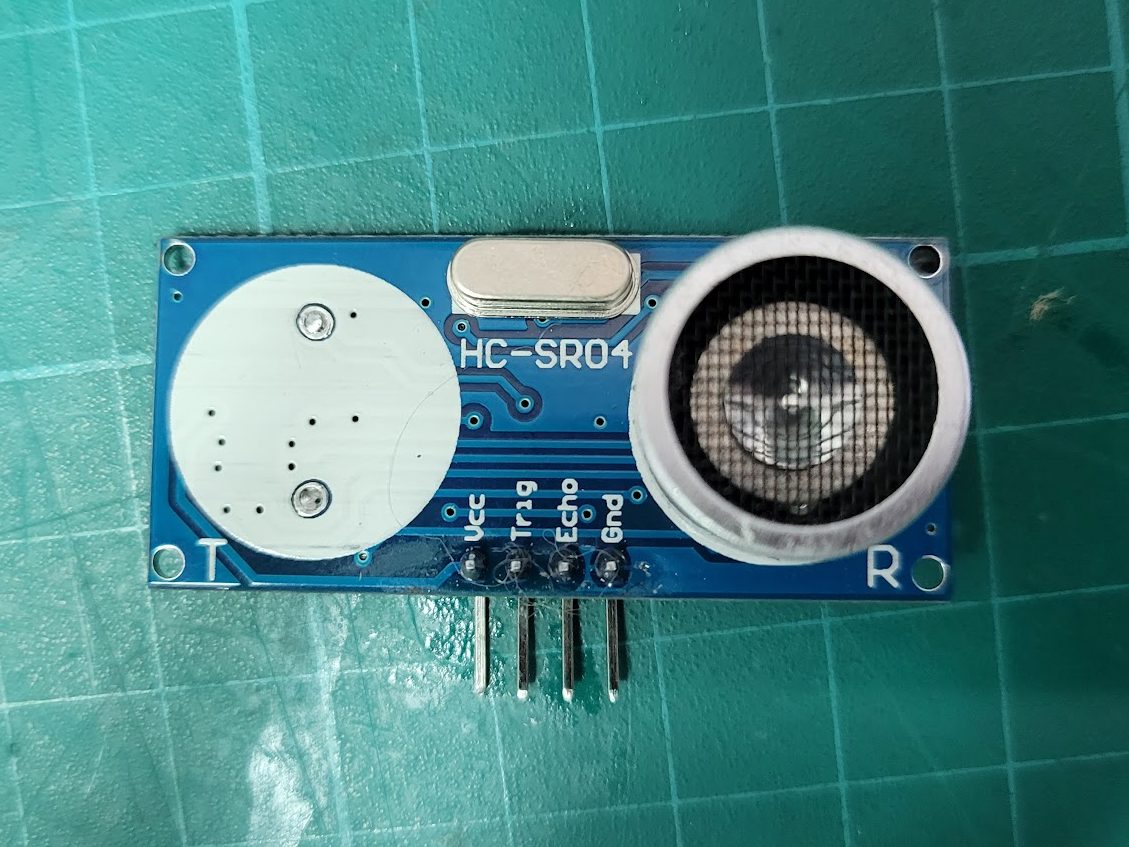
The fun thing here is using common “HC-SR04” modules in a way they weren’t intended. Normally these devices send out a pulse when they are triggered, listen for the echo, and output a pulse with a varying width that corresponds to a distance measurement. The receiver is only active for a short period of time after it is triggered, making it nearly useless for passive listening unless you trigger repeatedly and rapidly – it also would be transmitting pings and filling the environment with noise and echoes.
The first “hack” part is easy – desolder the transmit transducer from the module – now it can’t transmit anything and gives a short window for receiving. The second part is to synchronize the trigger for the receivers with the transmission from the beacon, so that hopefully the incoming ultrasonic wave hits within the “listening” time window. A radio signal works great, relative to ultrasound we can pretend it is instantaneous and use it to align all of the events.
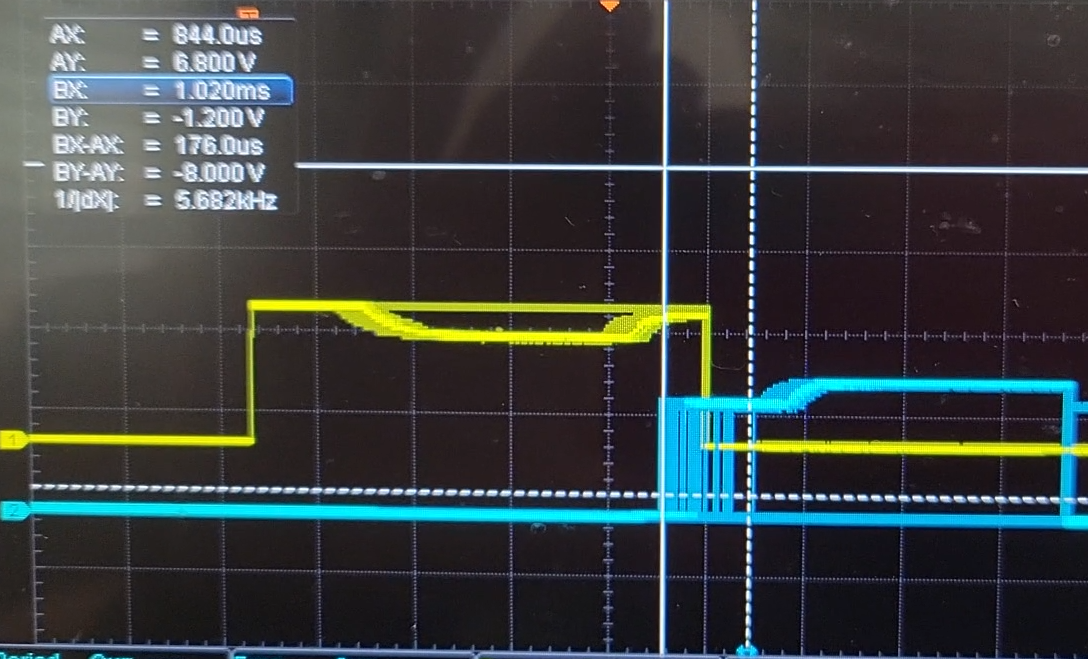
One important factor is the execution time for code on the microcontrollers that are running the show. It is best if interrupts can be used – ideally the amount of time between receiving the radio signal and triggering the modules is deterministic/repeatable – this way a consistent reading can be made for distance. In my test using a 433mhz radio I found the timing was very reliable; using the ESP-NOW protocol with the ESP-32 introduced about 200 microseconds of variability, which is not ideal, but only creates a couple of inches of distance error which is OK for the ranges I expect to use it at.
Rising edge of the blue channel shows the variability in the ESP-NOW packet interrupt
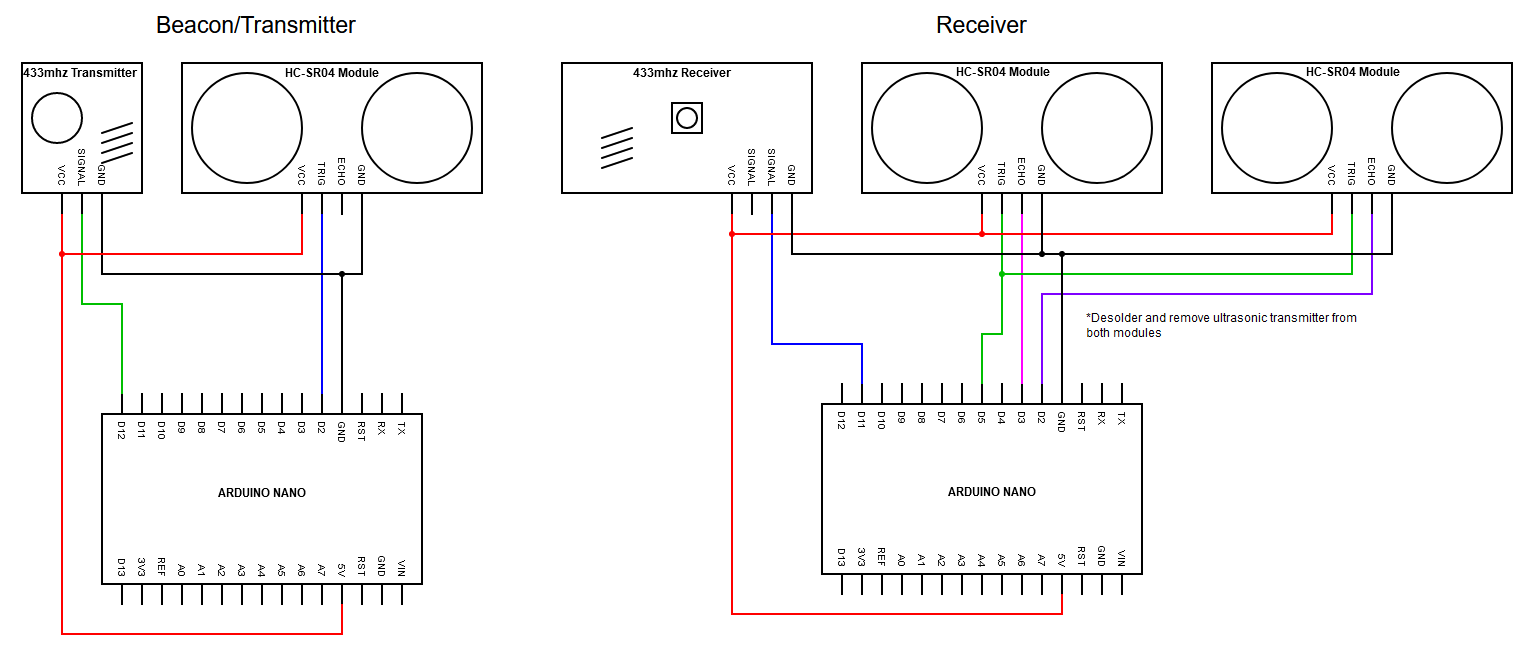
Wiring
Here is the first version I created with two Arduino Nanos:
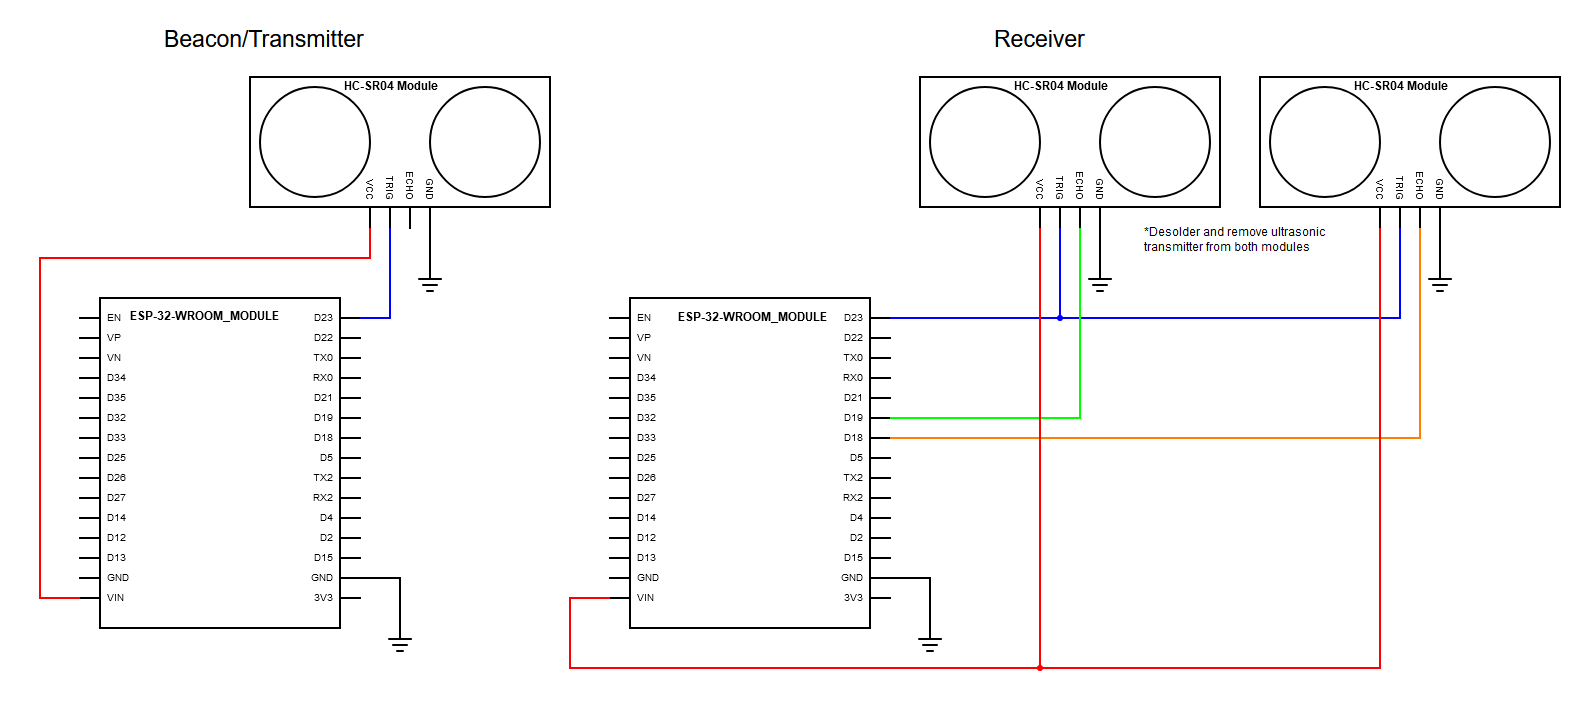
And here is the second version with two ESP-32 modules
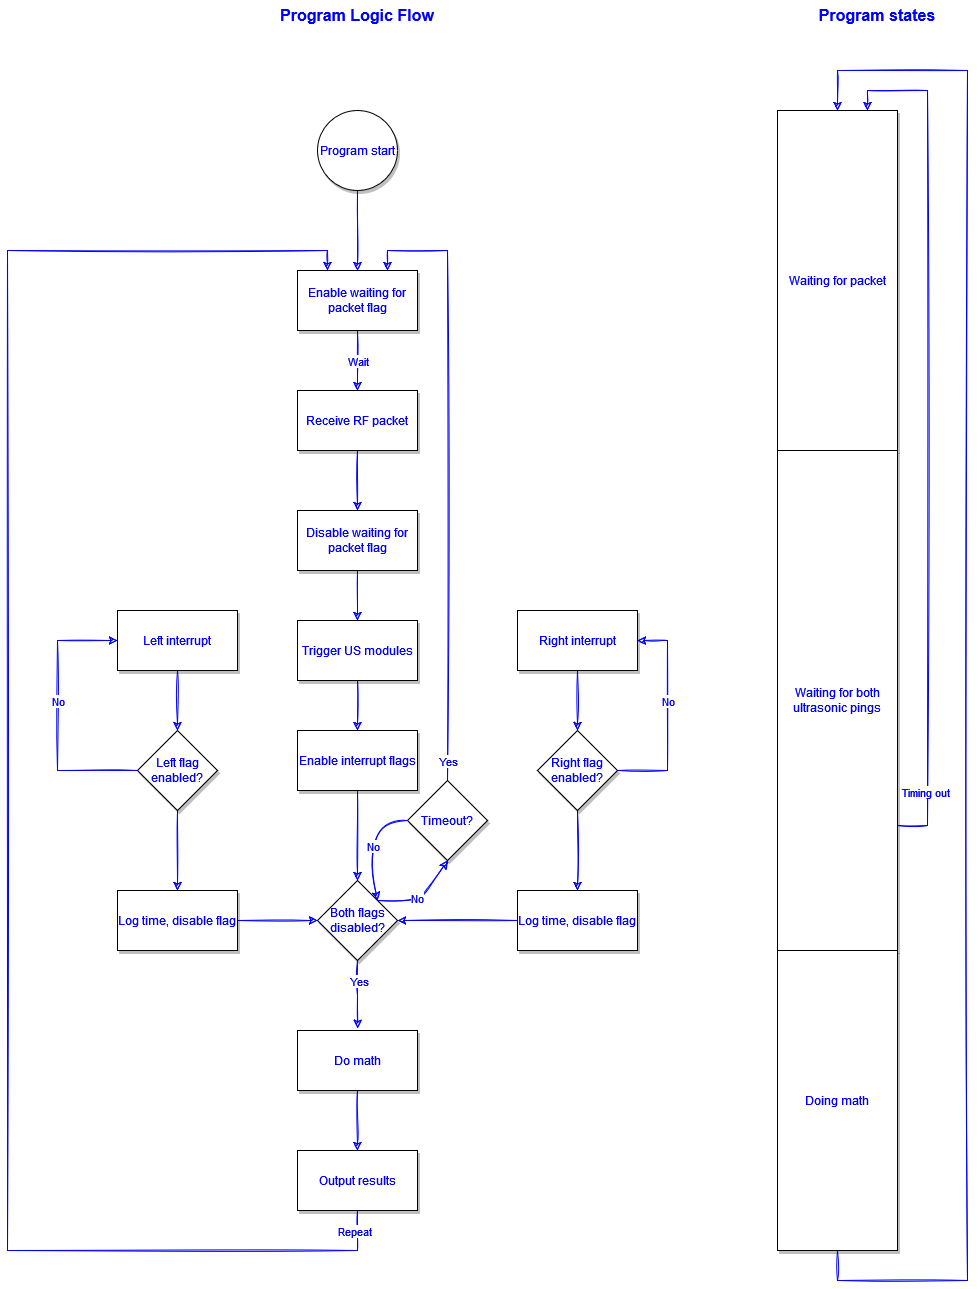
Program
This is the basic logic of the receiver – basically it starts a timer when a RF signal is received, then records the time when the ultrasonic ping is received at each receiver. Some math is done, then we have the distance and angle. The transmitter is even simpler, it just blindly fires off packets and pings repeatedly.
Code
Below is a zip file with four platformio projects in subfolders. There is a pair for the arduino and a pair for the ESP32. I didn’t do a great job on these, but I think they suffice to demonstrate the concept.
The performance is pretty good in my opinion, but not without some limitations. The angle resolution is quite good from about 2 feet to 30 feet. I don’t have good data on the ranging accuracy at longer distances, but it seems to be reliable within to a few inches – more testing is needed. It is susceptible to obstructions and echoes, as well as line of sight – the receivers and transmitter only work within about an 80 degree cone, so they must be pointed at each other to work. Software filtering would be a good idea to smooth out the readings. Here’s a quick video of my preliminary results – I haven’t implemented any safety features or tried to handle loss of signal just yet:
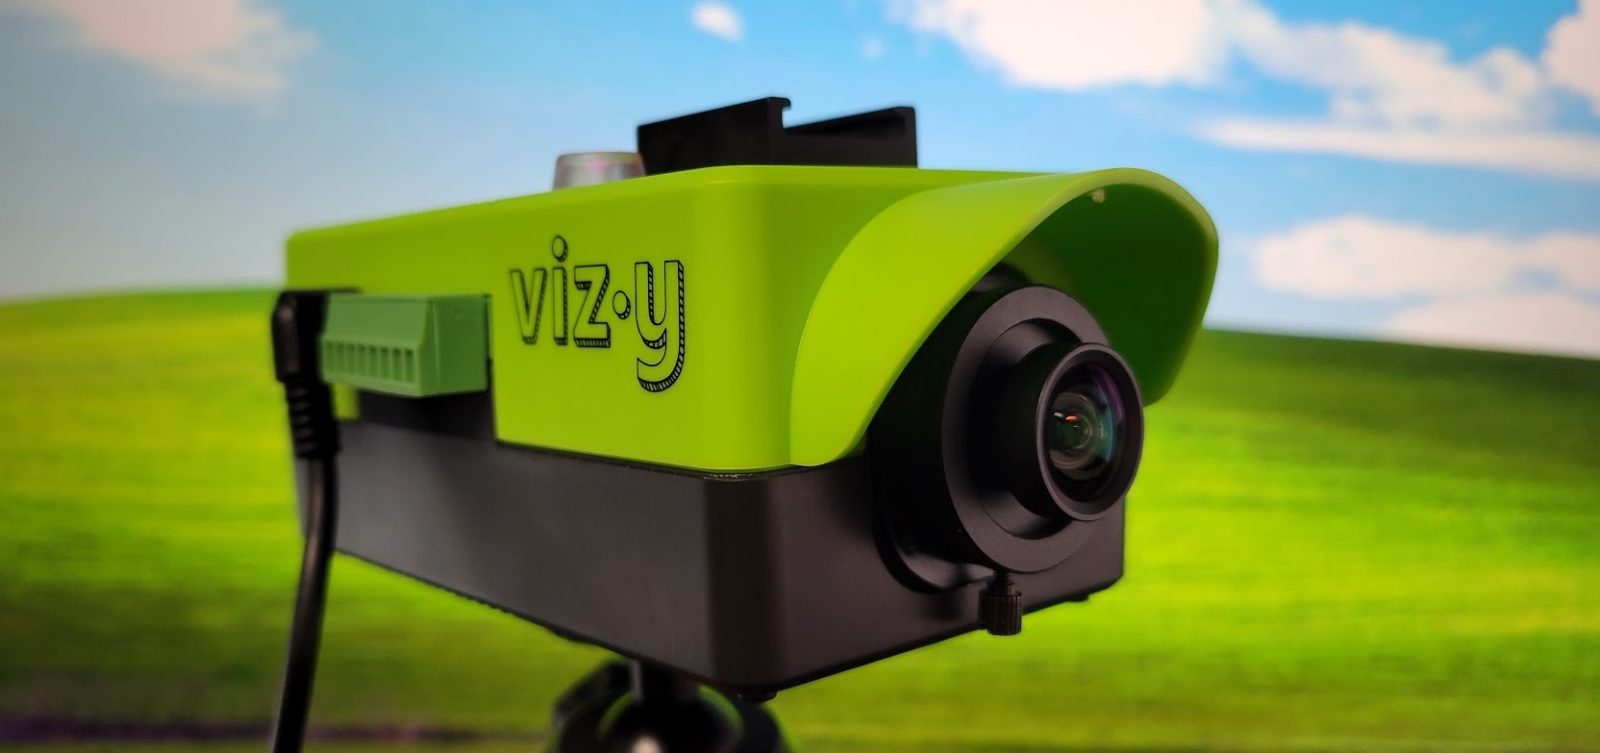
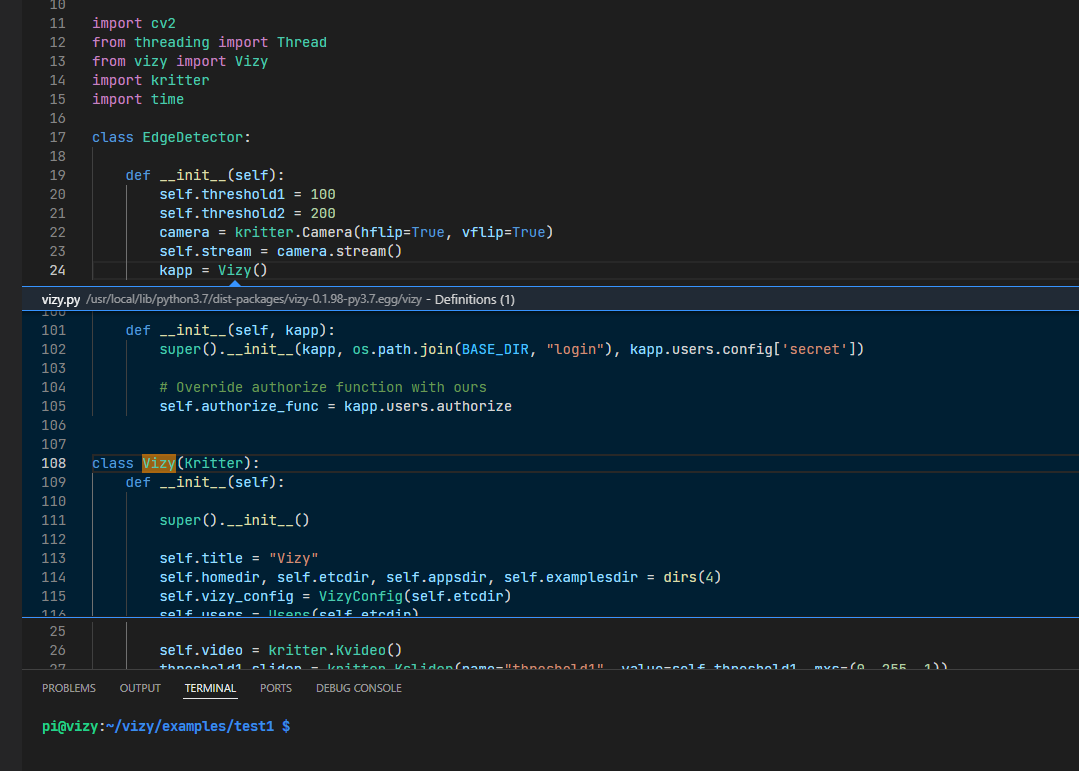
I just scooped up a Vizy Camera for a for a robot project I have in progress. Essentially this is a Raspberry Pi 4 with an Arducam camera and a custom power board in a bespoke case. Check the reviews on tomshardware and hackaday for a little more info. My first impressions are mostly positive – it was super easy to get straight into the included examples by following the quick start guide here.
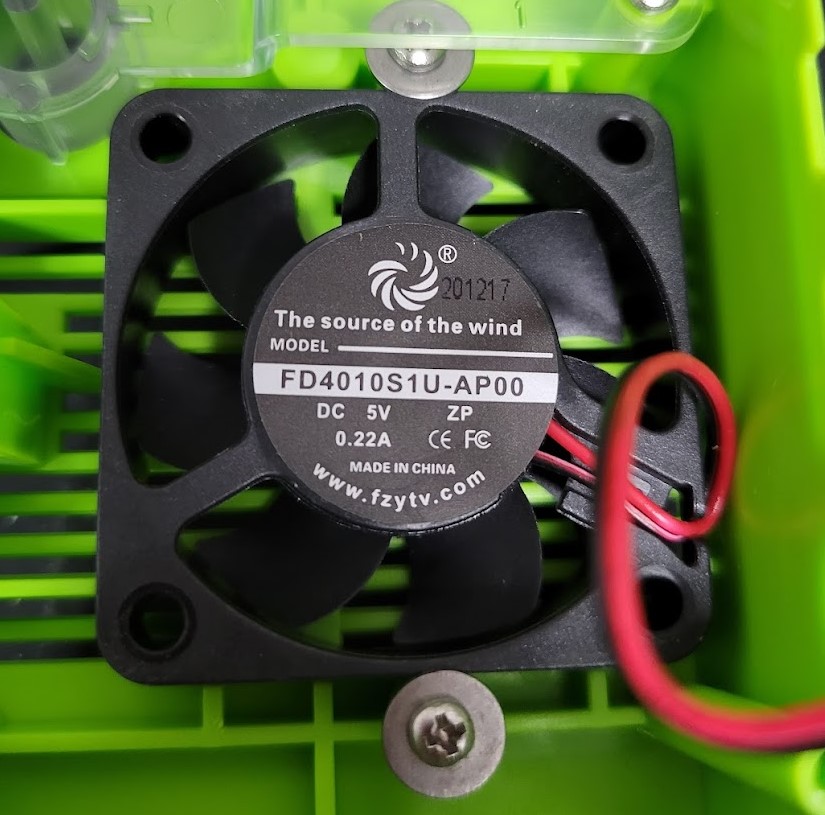
It is also the source of the noise
One negative that is immediately apparent is the cooling fan – it is hideously noisy – at low speeds there is a distracting amount of PWM noise. I quickly replaced this with a Noctua fan and it has made it far more tolerable to have on the desk while I work with it now. The other thing I’m not thrilled with is the documentation: it is quite good for set up and working with the examples; after that it tapers off, this is the best example to follow so far. I’m inexperienced with Raspberry Pi, not a Python expert, and have never worked with computer vision, so didn’t really know where to start. As I write this I have only spent a few hours poking around, but I do have VS Code hooked up so I can explore the scripts on the camera and start fiddling around – I want to share that in case I can help another newbie.
So, the goal is to be able to use VS code to explore and edit python files on the camera remotely from a desktop or laptop. I’m not going to cover using VNC to remotely access the pi desktop, or connecting to the drive over the network since Vizy mentions it here. The things I’m listing basically follow this much better guide.
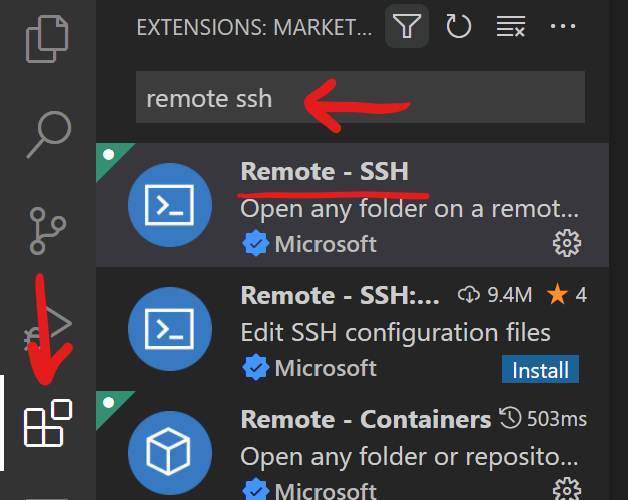
Open VS code, click on extensions, search for “remote ssh” and install it. It was already installed for me, so you may be able to skip this.
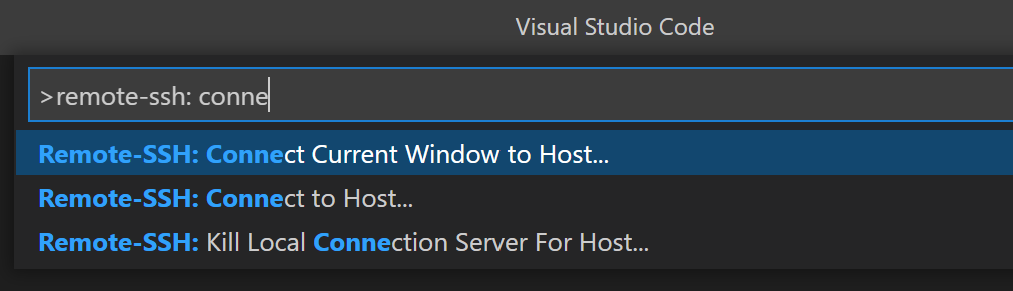
Open the command palette with CTRL+SHIFT+P and start typing “Remote-SSH: Connect current window to host”, then select it
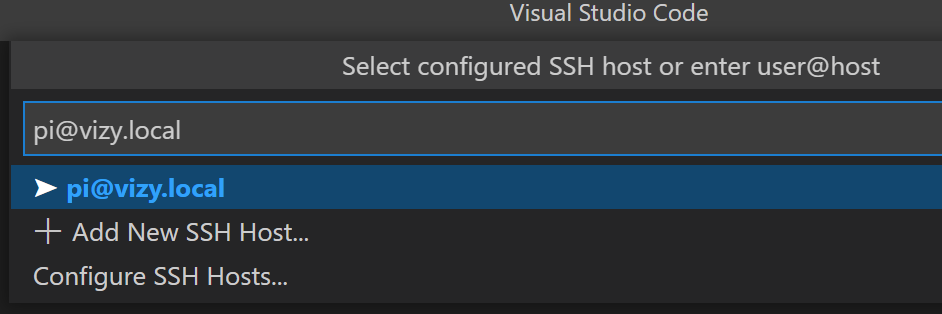
Select “add new SSH host”
If you haven’t changed any settings on the camera, enter “pi@vizy.local” for the connection
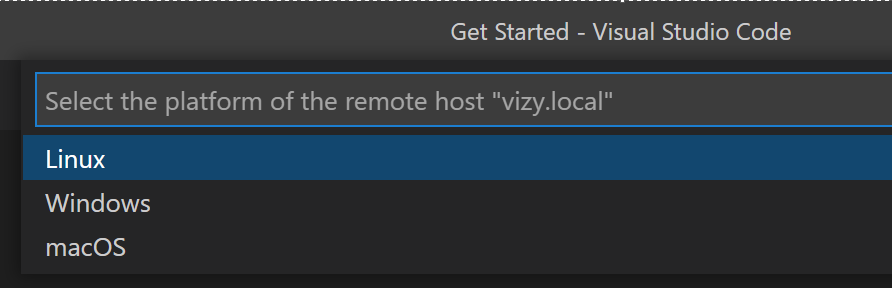
Select Linux
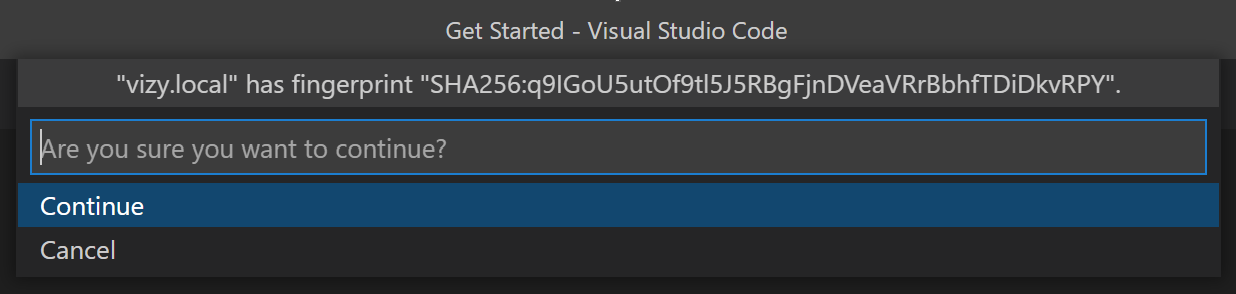
Confirm and continue
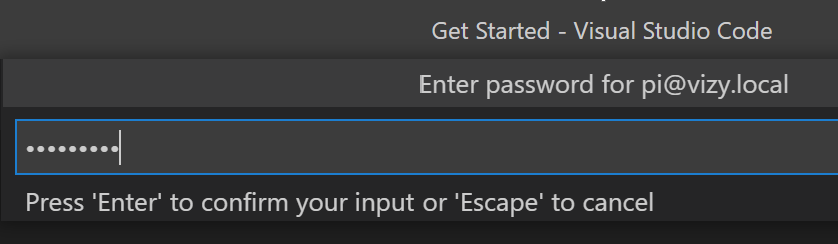
Next you should be prompted for a password, the default on the camera will be “raspberry”
If everything works, VS Code should connect and will install some stuff on the camera, so just wait a bit
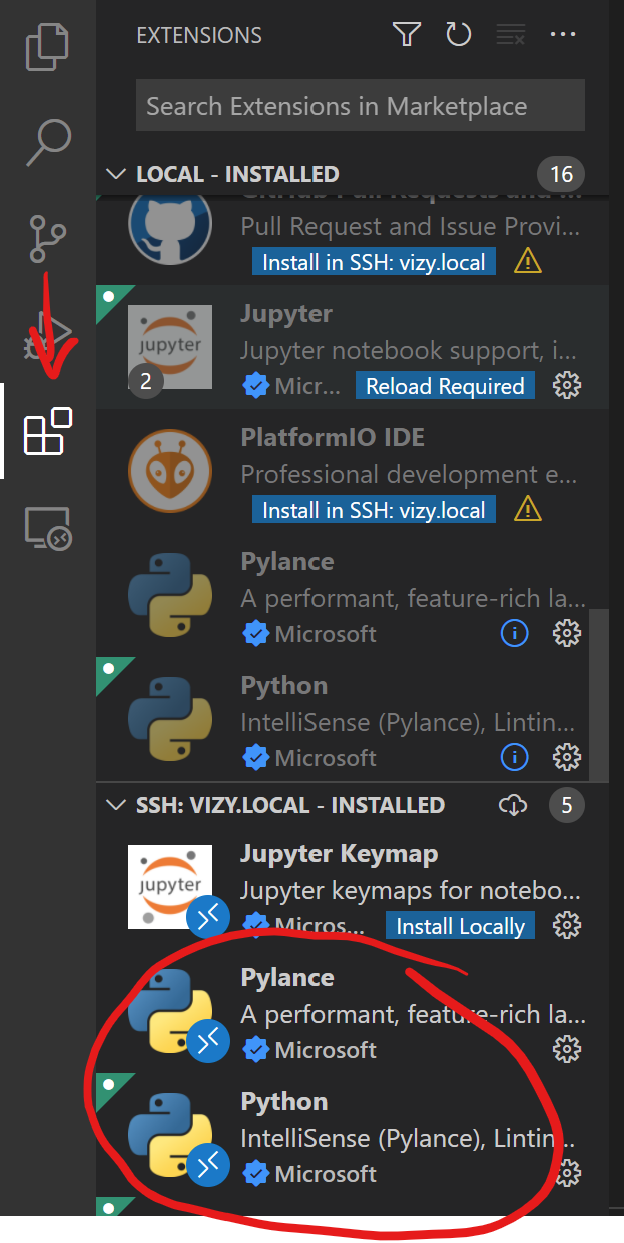
Go back to the extensions menu, you should now see another section (it may be collapsed) named something like “SSH: VIZY.LOCAL – INSTALLED”. We want to add Python and Pylance here. I already had these on my local machine, so they were showing under the SSH section with a blue button that said “Install in SSH: vizy.local”. Click that and wait some more. Adding these extensions will enable linting and all the usual python features for VS Code, and they’ll work remotely.
Now that you are connected, using file->open folder will open a dialogue box, from here you can pick a directory on the camera and open it up. You should be able to use this workspace in the same way as your local machine and do things like this:
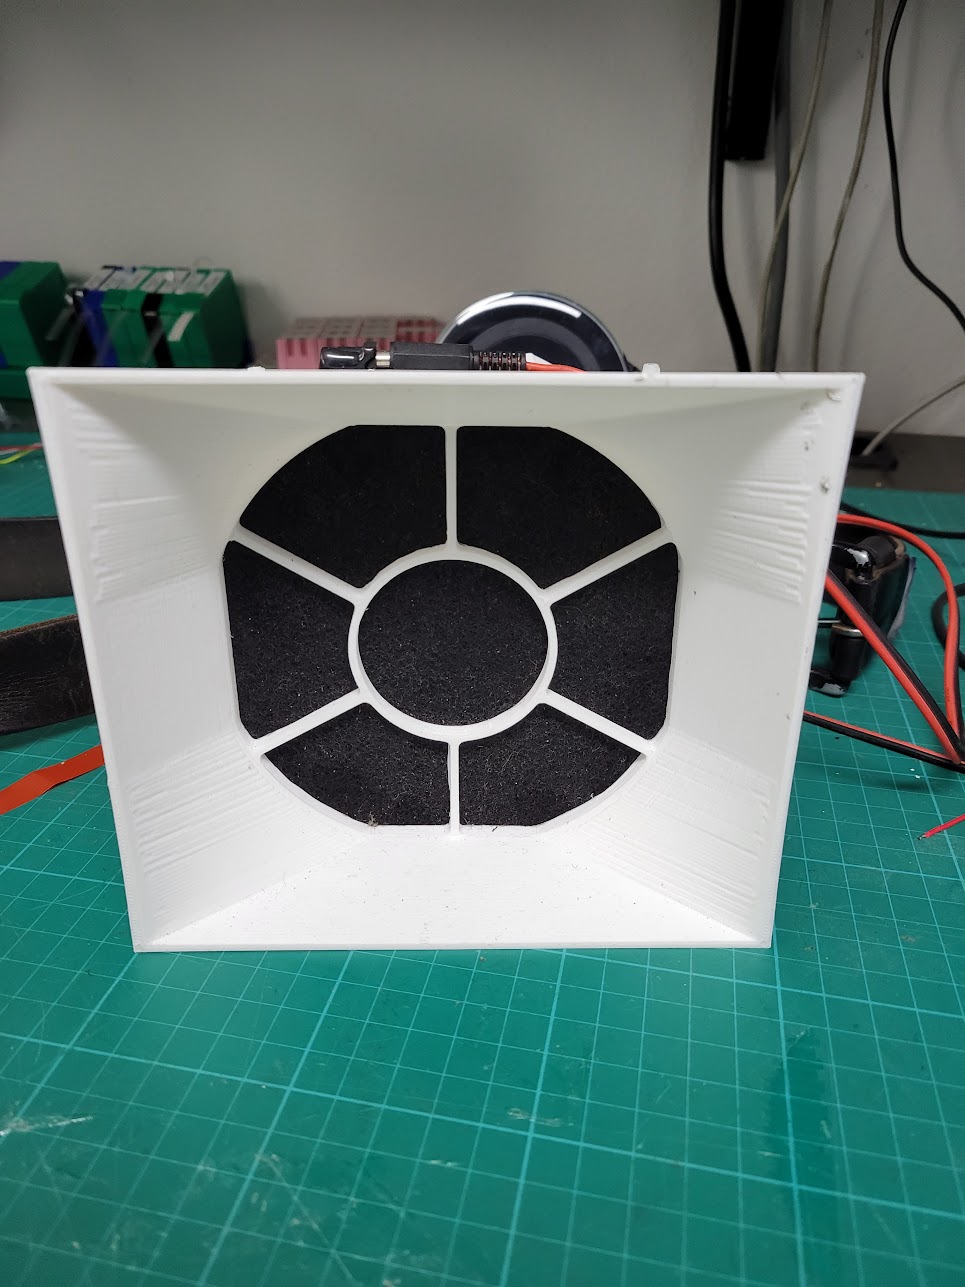
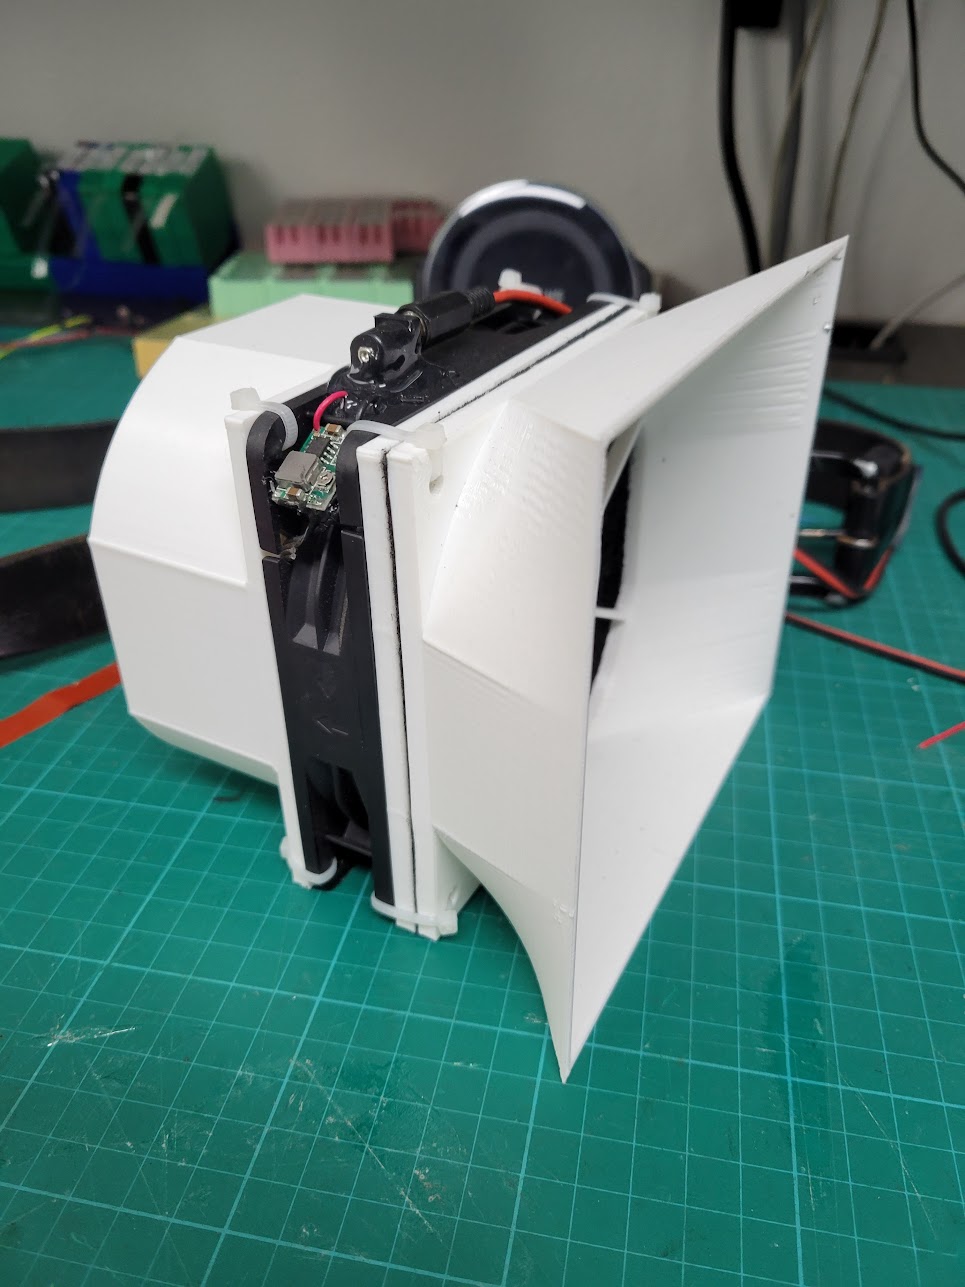
This is a quick and dirty thing to get solder fumes out of my face. Uses a 120mm computer case fan, a sheet of carbon filter material from Amazon, and held together in a sandwich by zip ties. (Filter is between the two parts with the “tie fighter” looking grid)